Add a Custom Cursor to your Browser

If you want to personalize your page, a custom cursor may be the answer—and this article will explain everything about it.

Discover how at OpenReplay.com.
I remember the first time I saw a custom cursor in a web game, replacing the usual pointer with an unusual sword-animated cursor. It got my attention right away and made the game immersive. The cursor in the Cursorblade game is an animated sword that helps players navigate the game itself, thus becoming an important gameplay element. This shows that custom cursors can be of great help regarding both function and theme.

Custom cursors have a surprisingly big influence on user experience. Not only do they add a unique touch to your browsing environment, but they also contribute to a website’s overall aesthetics. Businesses and creators use custom cursors as branding tools, particularly by aligning the image of web pointers with their respective website themes.
For instance, Cuberto is a digital design agency that specializes in motion graphics. Its customized cursor consists of a small, dynamic circle that alters into specific designs when hovering over different parts of the page. This not only increases interaction but also goes hand in hand with its trendy modern theme, which identifies it with creativity and interactive design for brands.

In addition, customized cursors help increase interaction for users who may need more visible or different pointers, hence improving accessibility and making the internet more user-friendly for this category of people.
This article will walk you through a step-by-step process for creating and personalizing custom cursors for your website.
What is a Custom Cursor?
A custom cursor is an image on your web browser that substitutes the default mouse pointer. Instead of using the conventional arrow or hand symbol, any picture, animation, or design of your choice can act as a custom cursor.
This customization personalizes the interaction between users and the web, adding a different dimension to the browsing experience. A custom cursor can range from funny icons to smart minimal designs that show your individual preferences or suit the style of some particular websites.
Different Types of Custom Cursors
Many custom cursor styles provide unique methods for personalization and enhancement of web browsing. Here are some of them:
- Animated Cursors: As you engage with different elements of a webpage, you see how the movements and modifications of the cursor happen. A cursor, for example, can become bouncy, rotate, or change color upon hovering on a hyperlink. In this way, animated cursors bring life to online browsing because they are not motionless but rather dynamic. For example, a butterfly-animated cursor from the Sweezy animated cursor pack is here.
 You can look up more animated cursors at Sweezy Cursors.
Themed Cursors: Themed cursors are built to correspond to a particular design or concept. For instance, a site for this Halloween season may have a cursor that appears like a ghost or a witch’s hat. Such cursors help create the overall mood of the website and make it easier for visitors to relate to its theme. Here is an example of a Halloween-themed cursor.

- Static Cursors: Non-animated, unique-image designs can serve as static cursors that substitute the regular mouse pointer. Most times, they are less complex in appearance than the animated versions. These are the best for people who prefer a personal feeling to their Pointers without unnecessary distractions.

Benefits of Using a Custom Cursor
Using custom cursors can make your browsing experience more personalized and enjoyable, but they can also improve usability, engagement, and overall satisfaction for users in a variety of ways. Here are some benefits of using a custom cursor:
Enhanced User Experience: With the custom cursor, browsing becomes more exciting and fun. This means that everyday tasks can turn into fun ones when you add a touch of creativity to your computer mouse cursor.
- Branding: Custom cursors allow companies and content creators to enhance brand identity. If the cursor has a color or design that is similar to either its theme or logo, then the branding will be made very consistent which will make visitors remember it better.
- Visual Feedback: Actions like clicking buttons, selecting texts, or dragging and dropping items, custom cursors give instant visual responses. The resulting feedback makes it possible to have a more interactive experience that is both pleasing and reactive.
- Accessibility: Individuals with visual impairments can be given custom cursors that are more colorful or handy. For instance, increased size or high contrast mouse cursor helps users with low vision navigate through websites comfortably.
Methods to Add a Custom Cursor
Depending on your technical knowledge and the amount of customization you want, there are several ways to add a custom cursor to the browser or web page. The following are three options.
Using Browser Extensions to Add a Custom Cursor
Bringing a unique cursor into your browser may be one of the easiest things you can do if you are unfamiliar with codes. This is usually accomplished by using browser add-ons or extensions. These programs are convenient since they do not need technical know-how and enable you to customize your cursor on all the websites you browse rather than on individual pages only.
How to Add a Custom Cursor Using Browser Extensions
First, go to your browser’s extension store to install a custom cursor. The Chrome Web Store is the place for Chrome users, and Firefox users should visit the Mozilla Add-ons site instead. Once you get there, search for “custom cursor” extensions. You will find such popular options like “Custom Cursor”. Click on one of these extensions that interests you and then click the “Add to Chrome” or “Add to Firefox” buttons to install it.

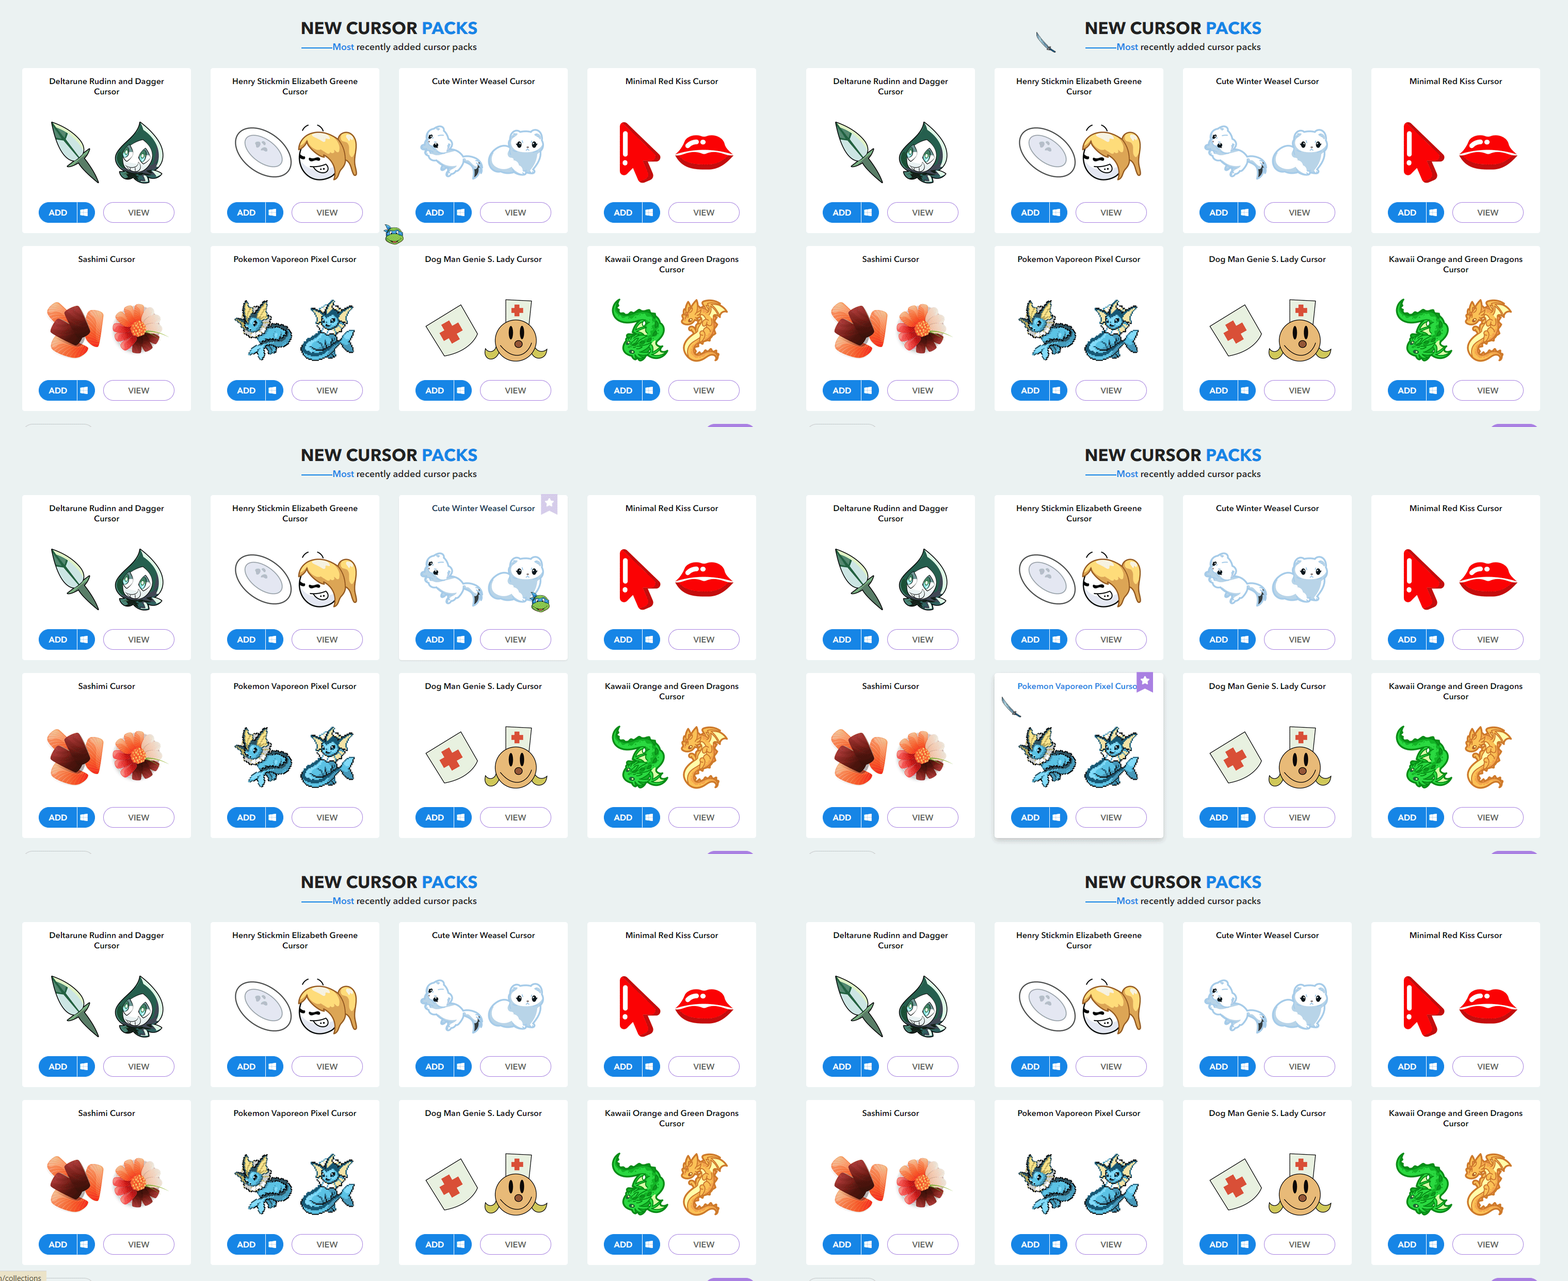
Next to the address bar of your browser screen, an extension icon will be displayed once it is installed. When you click on the icon, a dropdown list with designed cursors in animal shapes, cartoon figures, or seasonal designs is opened.
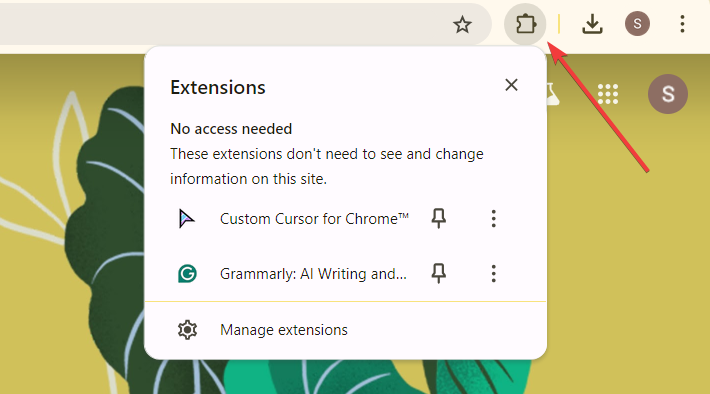
Select any custom cursor among the options provided.
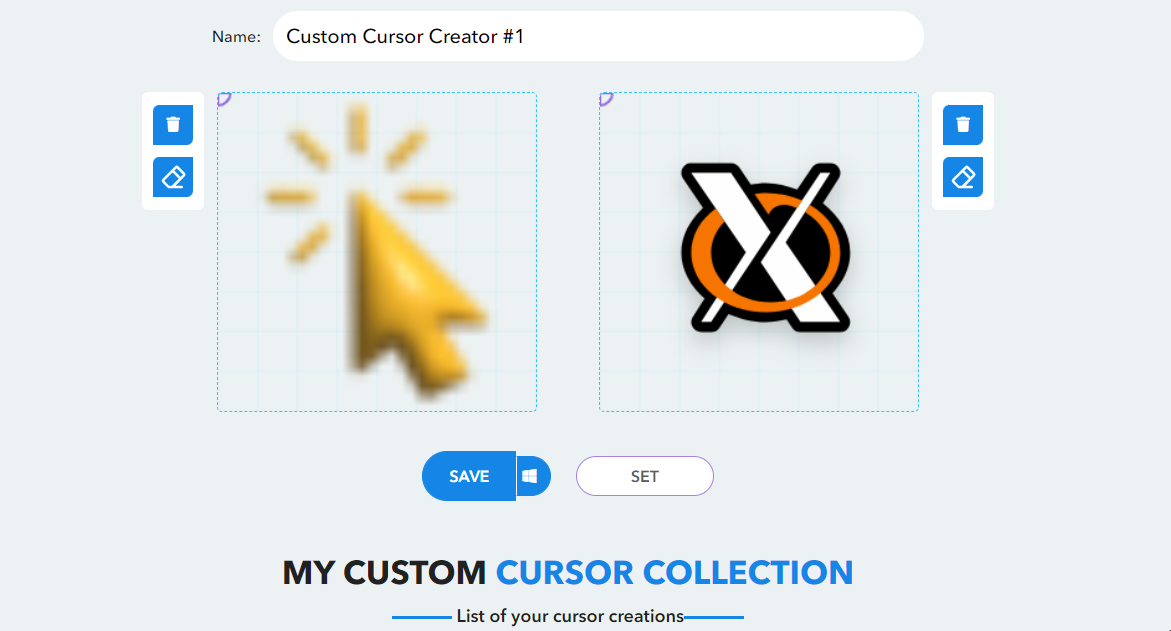
If you want to add your own mouse cursor, you can upload any image and use it as a cursor. Choose the upload option and select any file from your computer. This way, you will get a unique cursor on your PC within no time at all.
Once you have selected or uploaded the cursor of your choice, the default arrow will automatically be replaced with your selected one wherever you go on the browser. However, if someone wants to change their cursor again, they can open the extension menu and pick any new design that suits them, and it will apply straight away.
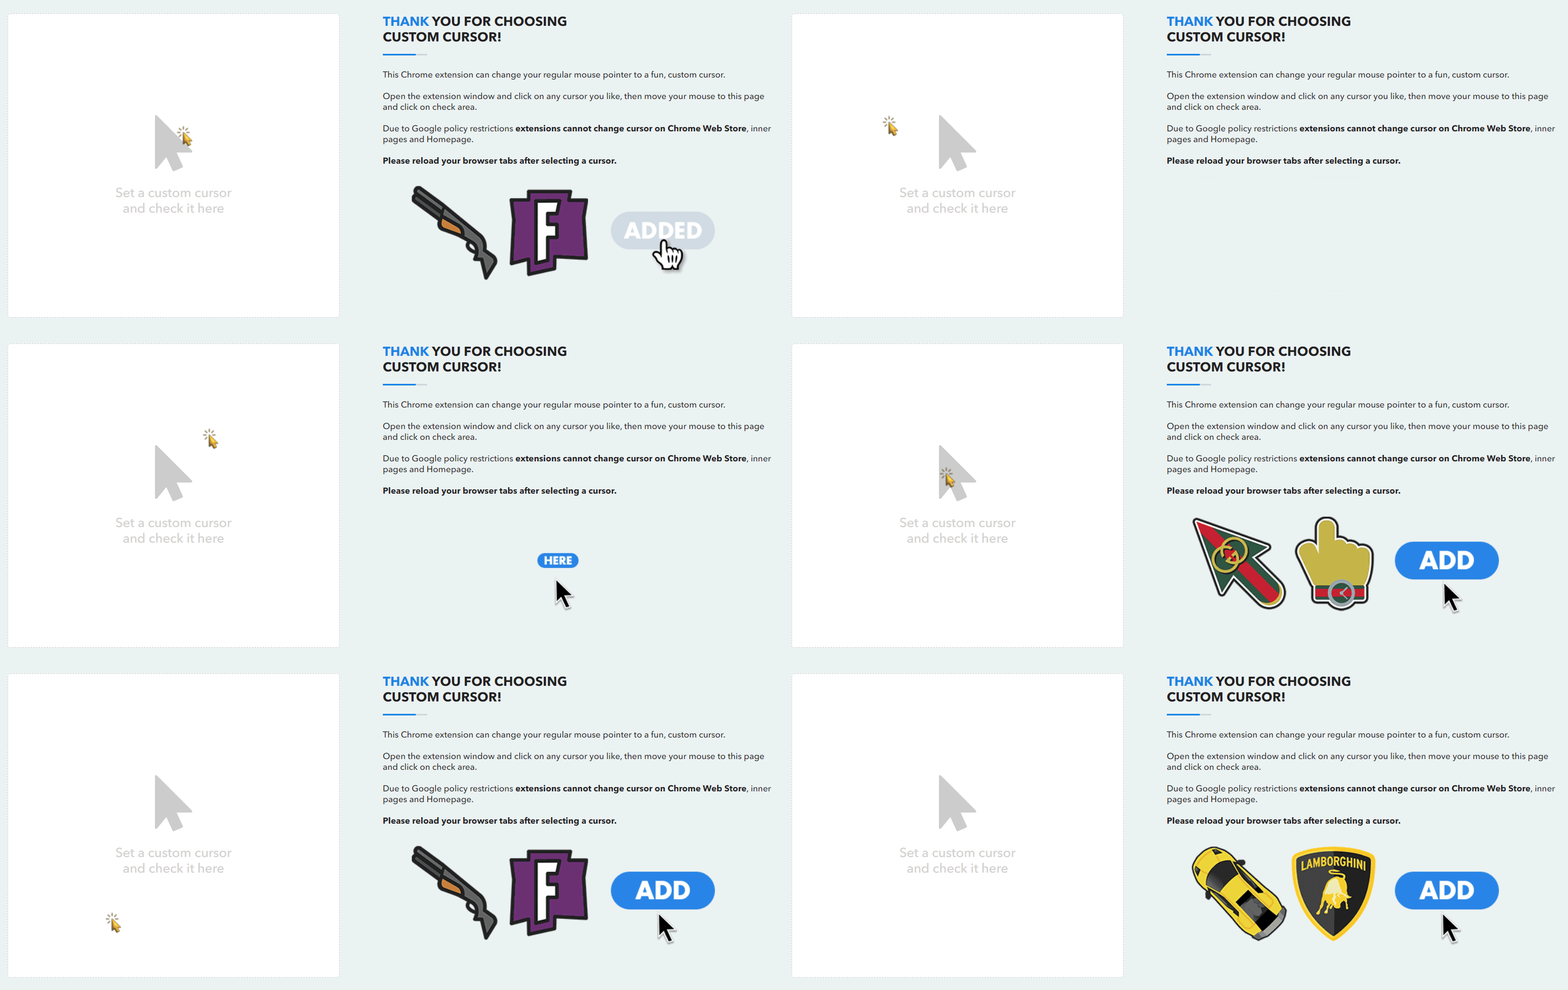
To go back to a default cursor, pick the “default” cursor setting from the extension’s configurations. This will allow you to easily change cursors or get back to the standard one any time you want.

How to Add a Custom Cursor Using CSS
For those with a basic understanding of web development and willing to get their hands dirty, using CSS allows a simple way to set your cursor on a website. This is the best way for web developers who intend to use a custom cursor throughout their entire website.
Implementing a personalized cursor using CSS can be a simple and efficient approach that demands little coding. Below is an easy guide for incorporating a custom cursor in CSS.
The first step is to prepare your cursor image. Before utilizing custom cursors, you are required to have an image file for the cursor. For compatibility, it is advisable to go for PNG or SVG file format. Keep your custom cursor size within 32x32 pixels or even smaller. As larger images may not appear well, and can even affect performance, adhering to this size rule guarantees a sleek and visually pleasing outcome.
Begin by heading to icons8 if you want to make your custom cursor. The website has a vast collection of pointer visuals that can be selected. Once this is done, another window will appear, presenting all the customization options.
You can personalize your cursor from that point on. There are so many customization options. You can change the icon color from the color palette, resize it, adjust the padding, add a sub-icon to your cursor, rotate the cursor, and several other options. This way, every detail about how one’s custom cursor appears and behaves is entirely up to them.
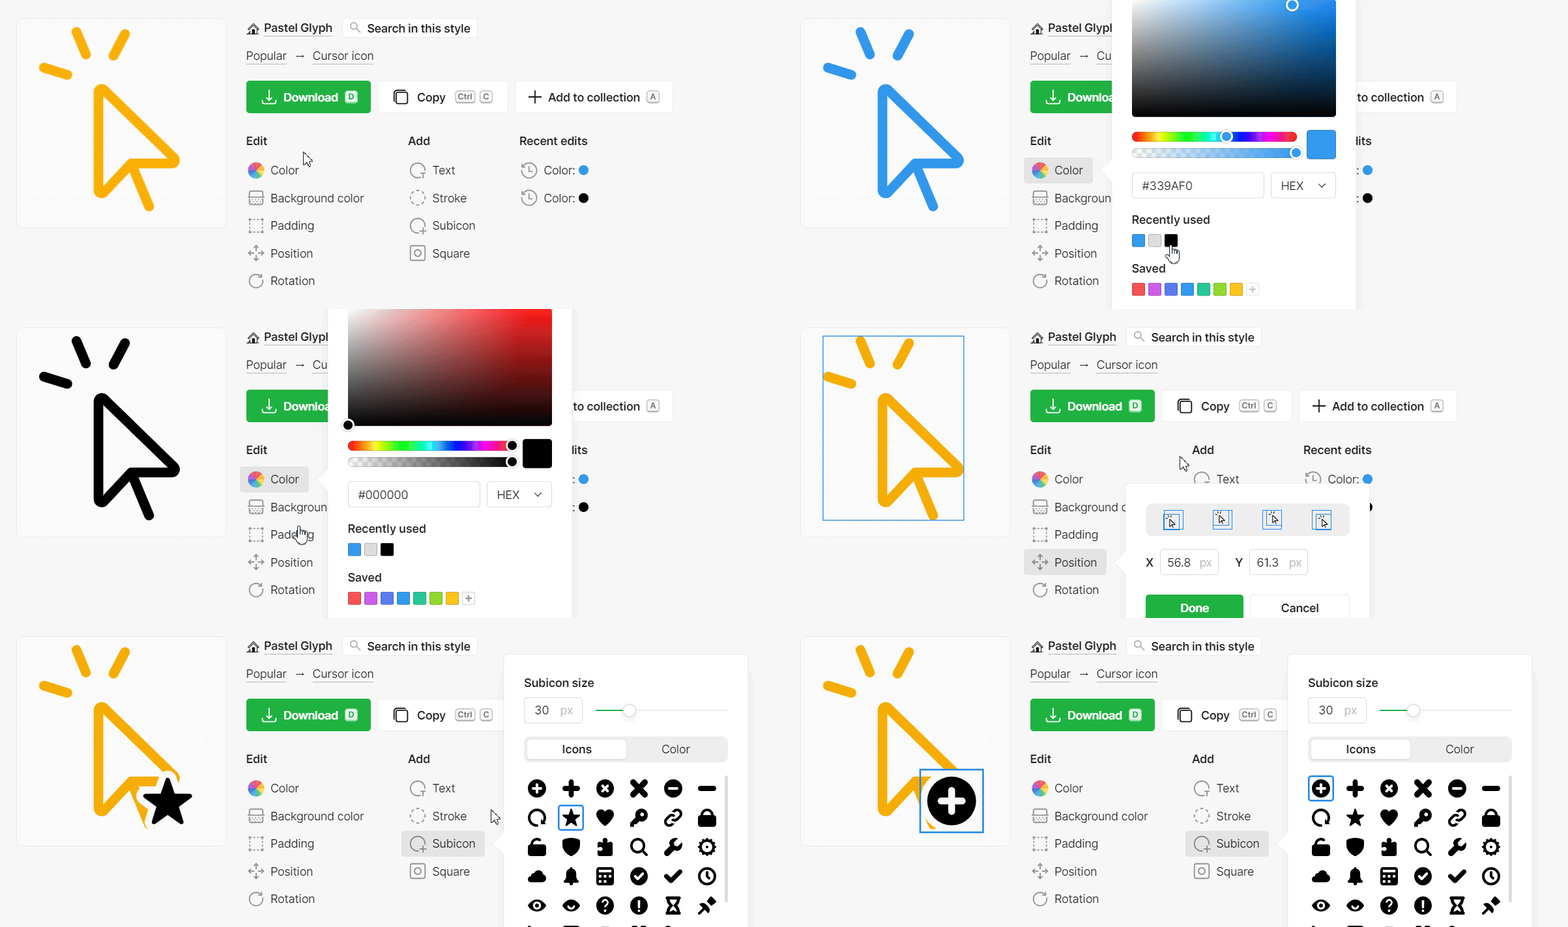
After completing your design, you can either download it in PNG format or copy its SVG, whatever suits you best. For websites, there is an option to directly link to Icons8’s provided PNG file.
As soon as your cursor image is prepared, it can be applied in the CSS via the cursor property. A simple example is given below:
html {
  cursor: url("img/custom-cursor.png"), auto;
}
This CSS rule applies a custom cursor to the entire webpage in this code. The property cursor defines the path to a custom image (img/custom-cursor.png).
<!DOCTYPE html>
<html lang="en">
  <head>
    <meta charset="UTF-8" />
    <meta name="viewport" content="width=device-width, initial-scale=1.0" />
    <title>Custom Cursor</title>
    <style>
      html {
        cursor: url("img/custom-cursor.png"), auto;
 }
    </style>
  </head>
  <body>
    <h1>Custom Cursor Example With CSS</h1>
    <p>Move your mouse around to see the custom cursor in action!</p>
  </body>
</html>
It will look like this.

You notice how the default cursor changes to the custom cursor immediately after you hover over the web page on the left from the example above. It goes back to the regular cursor on the right web page when you hover over the web page. This visual comparison shows the difference between the custom and default cursor as you navigate between the two web pages.
Including a fallback option like auto is additionally significant after defining the custom cursor. By so doing, the user will have their default cursor, like the arrow or pointer, telling them where they are even when the browser fails to load or support the image of a customized cursor. This way, the user is not at any point without an indication of the position of his pointer. This way, usability remains intact across various platforms.
Using JavaScript to Add a Custom Cursor
Custom cursors in web pages can be added via JavaScript dynamically. Unlike CSS, which mainly allows static styles, JavaScript allows for cursor changes that are more interactive and context-sensitive. Therefore, it would be ideal if you want a cursor that changes based on what the user likes when hovering over some objects or clicking buttons on a webpage.
Before you start coding, you will have to either select or design an image that you would like to utilize as your custom cursor. The photo must be compatible with the Internet (PNG, SVG) for it to be usable across multiple sites.
With JavaScript, altering the cursor property of HTML elements dynamically will easily assist you in using a custom cursor. This technique provides more adaptability since it enables altering your cursor in reaction to how individuals engage with it or based on particular conditions. A basic implementation consists of altering the cursor for an entire page, as in CSS, but it can also be changed dynamically.
<!DOCTYPE html>
<html lang="en">
  <head>
    <meta charset="UTF-8" />
    <meta name="viewport" content="width=device-width, initial-scale=1.0" />
    <title>Custom Cursor with JavaScript</title>
  </head>
  <body>
    <h1>Custom Cursor Example</h1>
    <p>Move your cursor around to see the custom cursor in action!</p>

    <script>
      // Apply the custom cursor to the entire html element
      document.documentElement.style.cursor = 'url("img/custom-cursor.png") 16 16, auto';
    </script>
  </body>
</html>
The custom cursor is set to the path where the image is located; in this instance, it is img/custom-cursor.png. The variables 16,16 are used to define the cursor’s hotspot, which is the place on your page where you register points of contact.

From the example above, two different web pages are lined up side by side. The web page on the left shows the custom cursor we generated when you hover over the web page, while the web page on the right shows your everyday default cursor.
By incorporating conditional logic or event listeners, you can make the cursor vary according to user actions.
Best Practices for Custom Cursors
When adding a personalized cursor to your browser, you must follow recommended actions. Here are some things you should know.
Image Size and Format
The effectiveness of your custom cursor depends critically on utilizing the correct image dimensions and type. It is suggested that cursor images should be 32x32 pixels or less. Images that are too big may not show well on various web browsers, resulting in slow loading time or movement delay when using that cursor.
The best formats are PNG and SVG. The former is suited for static images with transparency support, while the latter is appropriate for scalable and high-resolution designs. Keeping the file size small would be good to make it load quickly, giving an excellent user experience.
Usability Considerations
Custom cursors should help the user rather than hinder them. So, when you design or choose a pointer, make sure it is always functional. Don’t make overly complicated designs that may distract or confuse users. Your mouse cursor needs to show elements that can be interacted with, including links, buttons, or fields for input. The custom arrow should be checked on different gadgets and display dimensions to be sure it functions well. Not all users may appreciate or notice the change, so being subtle about them is often necessary.
Accessibility
One has to agree that accessibility is an important aspect when adding custom cursors to your site. The cursor should be clear and different enough for users with visual challenges. When checking accessibility, make sure to take into consideration size as well as color, and avoid using cursors that rely on color alone to convey meaning.
Moreover, users need to have an option that lets them turn off the custom cursor if they find it distracting or hard to use. It can be done by a setting option or just with one action of the user here restoring the default cursor. Whatever the case, always strive for consistency in function and usability standards of all users.
Troubleshooting Common Issues
When you implement your cursors on a website, some common problems may arise. Here’s how to troubleshoot and resolve them:
Cursor Not Displaying
If your custom cursor is not visible, the first thing to do is check the file path. Make sure that you have accurately specified the cursor image path and that it is linked to your HTML or CSS documents. Confirm that the image has an approved format like PNG or SVG.
Another frequent problem can be caused by the size of the image. Usually, if the image is bigger than 32x32 pixels, it may not look good in certain browsers. Also, delete your internet browser’s cache or open the incognito window to verify that this is not a caching problem.
Performance Issues
Custom cursors may sometimes cause performance issues. If you run into difficulties with a webpage’s loading speed, it could be because its custom cursor image files are typically large. This can lead to delays in moving around the page and leave it lagging, making it hard for users to work with.
To prevent such occurrences, you must have an optimized file of the image as your cursor file. Compress the image file to scale and ensure that its size remains very low without any distortion in terms of quality. If you happen to be using an animated mouse pointer, ensure it has smooth movement and is not too resource-intensive.
Cross-Browser Compatibility
If you use different browsers, it may not show the custom cursor correctly, leading to compatibility issues. Some browsers do not support certain cursor formats and sizes at all or display them differently from other browsers. As a result, you should try testing on multiple browsers, including Chrome, Firefox, Safari, Edge, and others.
Opt for fallback choices within your CSS so that a default cursor is always shown in case the custom one fails to load. Also, consider mobile devices and touch interfaces, as custom cursors may not be valid or required on those platforms. As necessary, use media queries to switch off custom cursors on devices where it doesn’t make sense to employ them.
Conclusion
A simple way to make your site stand out from others is to add a custom cursor. In this guide, we’ve looked at some methods of implementing a customized cursor in a web browser. We also discussed several best practices, such as selecting the appropriate image dimensions and file type, ensuring usability and accessibility, and resolving frequent problems like display problems or compatibility with multiple browsers.
While implementing these techniques, don’t hesitate to experiment with various cursor designs and styles. The web is a creative space, and your cursor is only another means of conveying the individuality of your website.
Truly understand users experience
See every user interaction, feel every frustration and track all hesitations with OpenReplay — the open-source digital experience platform. It can be self-hosted in minutes, giving you complete control over your customer data. . Check our GitHub repo and join the thousands of developers in our community..


