Building an Application with React Query

React Query is a library that simplifies the process of fetching, caching, synchronizing, and updating state in your React applications. It eliminates the need to manage the state of data received from network requests, as it provides the
useQuery()hook for wrapping such requests. This article will show you how to use the library to simplify handling server state, saving time and effort.
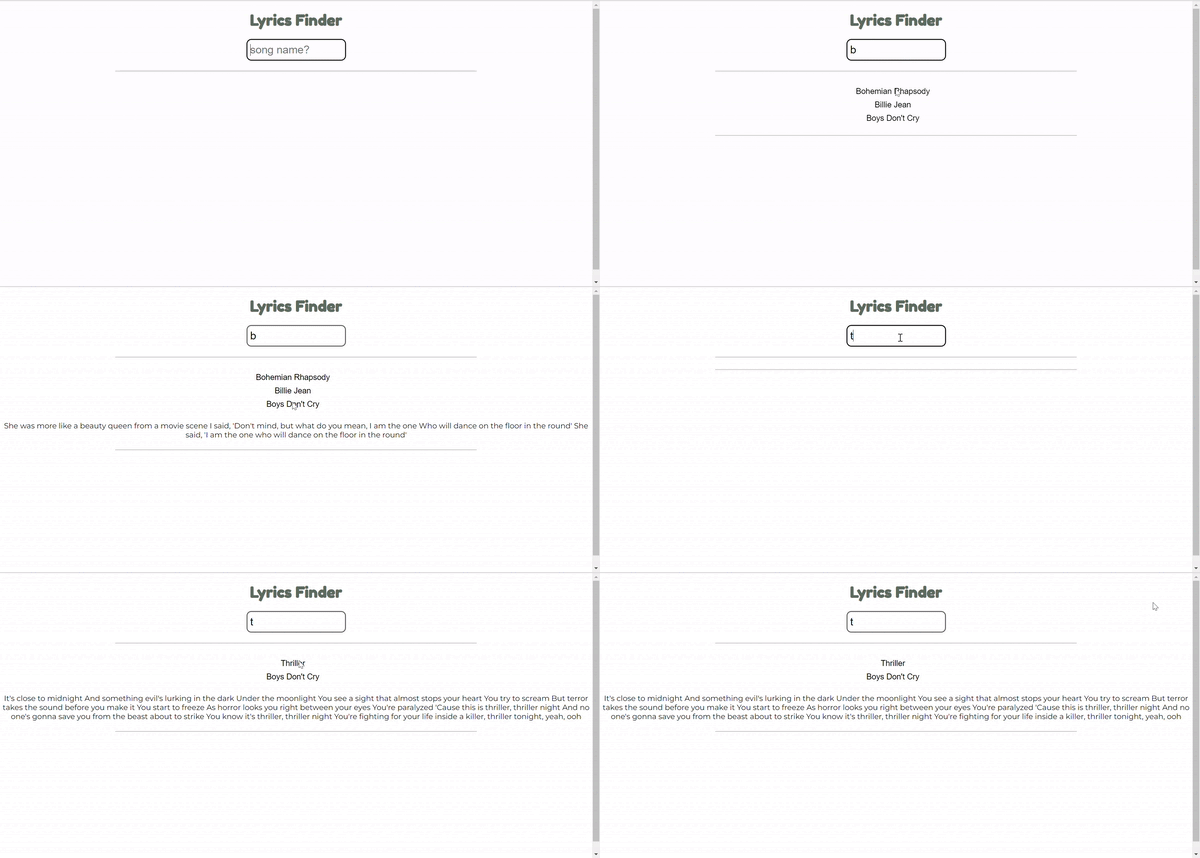
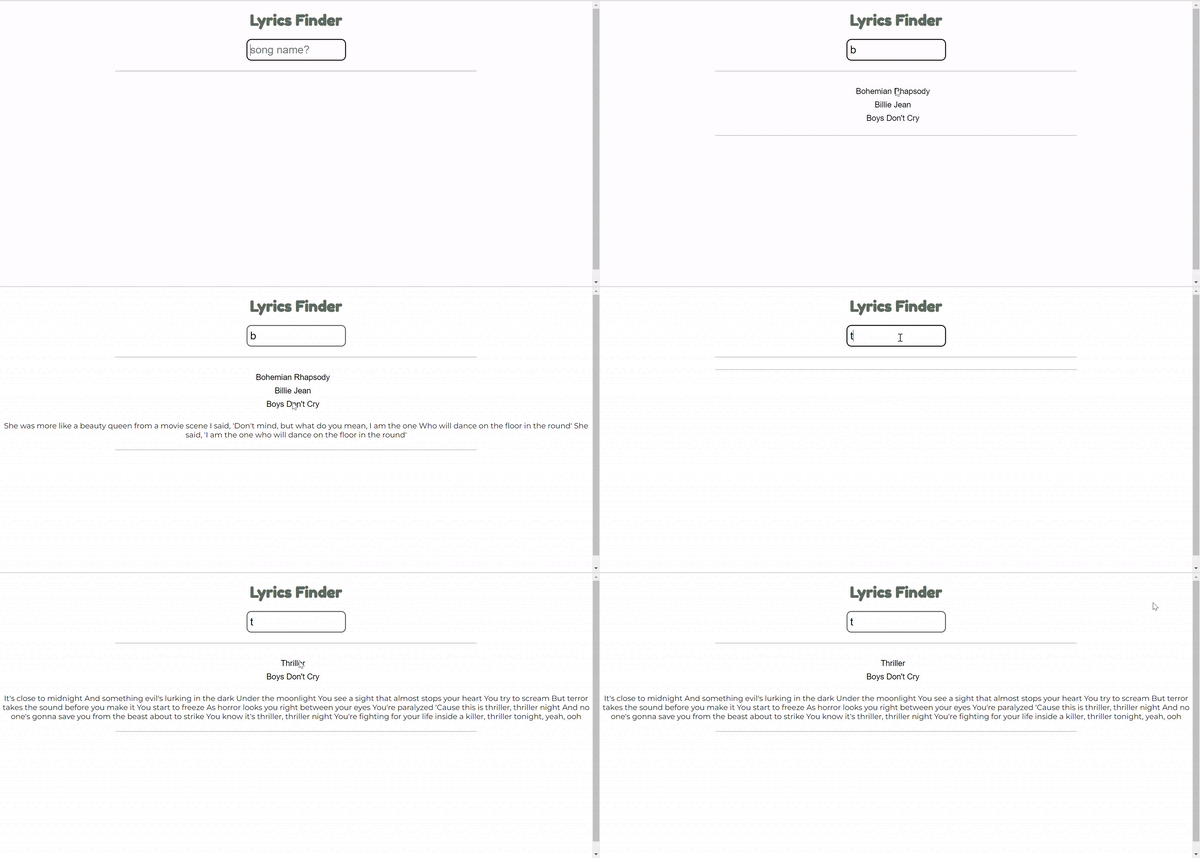
In this article, we will build a lyrics-finder app, focusing on the benefits of React Query like fetching and caching data from an API. This tutorial will help you spend less time handling your server data in React. At the end of the article, we should have an app that resembles the GIF below:

React Query as an Async State Manager
Traditionally, managing the state of asynchronous data in React can be a difficult and error-prone task. React Query simplifies this process by providing a set of hooks that allow you to declaratively fetch and manage data.
When using React Query, you define a query describing the data you want to fetch, including the endpoint URL, parameters, and options such as caching or prefetching. You then use the useQuery() hook to fetch and manage that data. The hook returns an object that includes the current state of the data, such as whether it is loading, has an error, or has successfully loaded, as well as the data itself.
The implementation of this hook looks like this:
const { isLoading, isFetching, error, data, status } = useQuery('data', Promise);React Query provides a powerful and easy-to-use way to manage and cache asynchronous data in your React application. Treating asynchronous data as a first-class citizen and providing a set of intuitive hooks makes working with data in React much smoother.
Features and Benefits of React-query
As a popular library in the React ecosystem, React Query helps manage and cache data fetching and state management for React applications. Here are some of the key features and benefits of React Query:
| Features | Benefits |
|---|---|
| Data caching and synchronization | Data is cached and synchronized automatically, reducing the need for manual management and making it easier to maintain consistency across the application. |
| Automatic query management | Queries are automatically managed, optimized, and deduplicated, reducing the required code and making it easier to manage complex data flows. |
| Real-time updates and polling | Real-time updates and polling are supported out of the box, allowing for real-time data synchronization without the need for manual configuration. |
| Error handling | Error handling is built in, with support for retries, caching, and timeouts, making it easier to handle network errors and ensure that data is always up to date. |
| Server-side rendering support | React Query supports server-side rendering, ensuring that data is available as soon as the page loads, reducing time-to-interactive, and improving the user experience. |
| Suspense integration | React Query integrates seamlessly with React’s Suspense API, enabling components to suspend rendering while data is being fetched, making it easier to manage complex data flows and ensuring that the user interface remains responsive. |
| Query composition and normalization | React Query supports query composition and normalization, allowing complex data structures to be broken down into smaller, more manageable parts, reducing the amount of code required and making it easier to maintain complex data flows. |
| TypeScript support | React Query has full TypeScript support, providing type safety and reducing the risk of runtime errors. |
| Extensibility | React Query is highly extensible, with a flexible plugin system and support for custom hooks, making it easy to add new functionality and adapt to changing requirements. |
Setting Development Area
We need a few dependencies installed. To accomplish this, run the code below in your terminal:
npx create-react-app react-query
npm install react-query axios
Replace the code in our index.js with the following code:
import React from 'react'
import ReactDOM from 'react-dom';
import './index.css';
import App from './App';
import { QueryClient, QueryClientProvider } from "react-query";
const queryClient = new QueryClient();
ReactDOM.render(
  <QueryClientProvider client={queryClient}>
    <App />
  </QueryClientProvider>,
  document.getElementById('root')
);
Also, make sure the main app.js is clean.
import './App.css';

function App() {

  return (
    <div className="container"></div>
  );
}
export default App;
We are set to code!
Network Request
Let’s review some concepts about requests to better understand what React Query does. The following statuses characterize a network request:
- Request to the Backend
- Idle
IsLoading- Processing
- Data
IsError
When a user/client sends a network request to a server, the request goes through different phases before completion. The first phase is the Idle phase, where the request is waiting to be sent out. This means the request is waiting for resources to be allocated and other requests to complete before it can be sent.
The next phase is the Loading phase, where the request is sent to the server, and the server processes it. During this phase, the client/user waits for acknowledgments and packets from the server to ensure the request is being processed correctly. This phase is important because it determines the speed of the network request and the quality of the user experience.
Once the request is successfully processed, the request enters the Data state, where the client/user receives the data or response from the server. If there was an error during processing, the request would instead enter the Error state, where the client/user will receive an error message.
A network request’s default and last phase is the Idle state. During the “Loading” phase, the client/user is waiting for acknowledgments and packets from the server before the request enters the Data or Error state, depending on whether the request was successfully processed or not.
Managing Data State with useQuery()
Axios will fetch a list of songs from our custom API. To do this, these are the actions we must take:
Create a Lyrics.js component. This component will be responsible for fetching data in our application using Axios. This is what it looks like:
import axios from "axios";
async function fetchLyrics() {
  const { data } = await axios.get("http://localhost:8081/fetchlyrics/");
  return data;
}
export default fetchLyrics;
Create a Fetched.js component. This component will be responsible for managing our server state and displaying lyrics fetched from the API. To do this, we import useQuery() from react-query and fetchLyrics from Lyric.js.
Caching is handled utilizing isLoading and isError methods from useQuery(). By traversing the array of objects in our API, we return a list of buttons carrying data of songs fetched in our JSX. Data are made available in our JSX through a unique key from useQuery().
import React from "react";
import "./App.css";
import fetchLyrics from "./Lyric";
import { useQuery } from "react-query";
function Fetched() {
  const { data, error, isError, isLoading } = useQuery("lyrics", fetchLyrics);

  if (isLoading) {
    return <div>Loading...</div>;
  }
  if (isError) {
    return <div>Error! {error.message}</div>;
  }
  return (
    <>
      <pre>
        {filtered.map((fetchLyrics, server) => {
          return (
            <li key={server}>
              <button>{fetchLyrics.Song}</button>{" "}
            </li>
          );
        })}
      </pre>
    </>
  );
}
export default Fetched;
In our main app.js, we will import our Fetched.js component.
Session Replay for Developers
Uncover frustrations, understand bugs and fix slowdowns like never before with OpenReplay — an open-source session replay tool for developers. Self-host it in minutes, and have complete control over your customer data. Check our GitHub repo and join the thousands of developers in our community.
Handling onClick() Function
This section aims to improve our user experience by making every lyric displayed clickable. To do so, copy and paste the code below:
const [lyrics, setLyrics] = useState("")

const fetchSongDetails = (Song) => {
  const filterSong = data.filter((item) => item.Song === Song)
  setLyrics(filterSong[0].lyrics)
  }
This code snippet declares a state variable called lyrics and initializes it with an empty string using the useState hook. The second variable, setLyrics, is a function that is used to update the lyrics state variable.
The fetchSongDetails function takes in a parameter Song, which filters out an item from an array called data. The filtering is done using the filter() method, which returns an array of all the items that satisfy the given condition. In this case, it returns an array with only one item with a Song property equal to the Song parameter passed into the function.
The song lyrics are then retrieved from the first item in the filtered array using the lyrics property. The setLyrics function is called to update the lyrics state variable with the retrieved lyrics, so it can be used in the UI to display the song’s lyrics.
To display the song’s lyrics in our UI, paste the code below in the JSX:
<pre>
  {filtered.map((fetchLyrics, server) => {
    return (
      <li key={server}>
        <button
          onClick={(e) => {
            fetchSongDetails(fetchLyrics.id);
          }}
        >
          {fetchLyrics.Song}
        </button>{" "}
      </li>
    );
  })}
</pre>;
Search Bar Function
A lyrics app remains unfinished until you give the user a tool to search for his or her preferred song. The search bar function will filter the rendered data with the letter values passed in it. It’s quite an easy task to handle. All we need to do is, create a search bar in our main app.js and pass its value as props to our fetched components.
function App() {
  const [value, setValue] = useState("");

  return (
    <div className="container">
      <div className="App">
        <h1>Lyrics Finder</h1>
        <input
          type="text"
          className="input"
          placeholder="song name?"
          value={value}
          onChange={(e) => setValue(e.target.value)}
        />

        <Fetched searchValue={value} />
      </div>
    </div>
  );
}
export default App;
To filter our data with letters passed, paste the code below in our Fetched component:
function Fetched({ searchedValue }) {
  const { data, error, isError, isLoading } = useQuery('lyrics', fetchLyrics)
  const [filtered, setFiltred] = useState([])

  useEffect(() => {
    const handleSearch = (data, searchedValue) => {
      const filtered = data.filter(value => {
        const search = searchedValue.toLowerCase();
        const nameMatches = value.Song.toLowerCase().includes(search);
        return nameMatches
      });
      setFiltred(filtered)
    }
    if (data) {
      handleSearch(data, searchedValue)
    }

  }, [searchedValue,data])
Display the Clicked Data
The last thing we will do is display only the lyrics whenever it is clicked on and hide the data until a value is passed in the search bar. To do so, use the code below:
const [lyrics, setLyrics] = useState("")

const fetchSongDetails = (id) => {
  const filtersong = data.filter((item) => item.id === id)
    setLyrics(filtersong[0].Lyrics)
  }

  return (
    <>
      <pre>{filtered.map((fetchLyrics, server) => {
        return <li key={server}><button onClick={(e)=>{fetchSongDetails(fetchLyrics.id)}}>{fetchLyrics.Song}</button>             </li>
      })}</pre>
      <div>{lyrics}</div>
    </>
  )
}
In our app.js, we can hide displayed data until values are passed into the search bar using an If statement.
{
  value !== "" ? <Fetched searchedValue={value} /> : null;
}
To style the app, use the code below:
@import url("https://fonts.googleapis.com/css2?family=Fredoka+One&family=Montserrat&display=swap");
.App {
min-height: 100vh;
  height: auto;
  text-align: center;
  font-family: "Montserrat", sans-serif;
}

h1 {
  font-family: "Fredoka One", cursive;
  color: #5c6b60;
}

pre {
  font-size: 25px;
  color: #646669;
}

hr {
  margin-top: 22px;
  width: 61%;
}

.input {
  width: 200px;
  height: 40px;
  border: 2.5px solid #606263;
  border-radius: 10px;
  padding-left: 6px;
  font-size: 23px;
}
.lyrics{
  list-style: none;

}
.btn{
  border: none;
  background-color: transparent;
  font-size: 17px;
}
At this point, we should have this:

Conclusion
In this tutorial, with the help of React-query, we managed our server data in this article. As we construct more complicated apps, it gets harder to manage the server state of many API endpoints. Our application is manageable thanks to React Query’s assistance in managing data requests.


