How to use the CSS :has Selector

The recent :has() selector lets you apply styles to parents and other ancestors, and this article will show you how to use it for your web app development.

Discover how at OpenReplay.com.
In the world of CSS, selectors are the workhorse powering the beautiful and responsive designs we see on the web. They allow developers to select and style HTML elements based on their properties, position, and relationships.
A more recent CSS selector/pseudo-class known as :has allows you to choose every element that has child elements matching the selector you provide to the :has() function. It is an important solution in CSS beyond being a simple “parent” selector.
Using the :has() selector, you can apply styles to a parent or ancestor HTML element. This allows us to extend the selector’s scope to include one or multiple siblings or children.
In this article, we will look at the CSS :has selectors and multiple examples of their use in your code.
When to use the :has selector
The :has() selector is a CSS pseudo-class that allows you to select an element if it contains certain child elements. It is a powerful CSS tool you could use for the following purposes:
-
Styling the parent of a child element: You could use the
:has()selector to style a<div>element if it contains a<p>element. -
Conditionally adding or removing styles: You can use the
:has()selector to add a border to a<div>element if it contains a certain number of child elements. -
Selecting elements based on their content: You can use the
:has()selector to select all<div>elements that contain a child element with the class of"important".
The :has() selector can be used with any valid CSS selector, including other pseudo-classes. This makes it a very versatile tool that can be used in various ways.
Here is a little snippet of how the :has() selector can be used:
/* Select all <div> elements that contain a <p> element. */
div:has(p) {
 background-color: blue;
}

/* Select all <div> elements that contain a child element with the class "important". */
div:has(.important) {
 border: 1px solid black;
}
/* Select all <div> elements that contain at least two child elements. */
div:has(> * + *) {
 padding: 10px;
}
The code above shows practical examples of how the :has selector can be used. But before we dive deeper into using the :has selector, let’s examine why the selector is important.
Project Setup
To start this project, you can clone the starter code from this GitHub repo. The completed repo is also in the repo, but you need to use the starter code to follow along with this tutorial.

The image above shows what our project looks like when launched on the browser.
Note: The project is just a simple blog-like demo to show you how the :has pseudo-class is generally used.
Forward vs. Reverse Selections
Previously, developers could only select forwards, but with the :has selector, you can now select backward as well.
Now, we are going to select the parent of an element. In the past, this was usually done like this:
article + article {
 background-color: pink;
}
Here, we selected an article and another article using the adjacent sibling selector, then we changed the background-color to pink. This is the result below:

As you can notice, the color of the second and third article is changed. This is because they are adjacent to each other. So, it selected forwards and not backward. Now, let’s do this in reverse with the :has selector.
article:has(+ article) {
 background-color: coral;
}
In the code above, we simply say, if the article has an adjacent article, select the first two articles.

Now, notice it selected the first and second articles this time around.
Selections based on child elements
With :has we can do more than select the parent; we can also select the child elements.
article:has(span) .bold {
 background-color: lightyellow;
}
article:has(span) .italic {
 text-decoration: underline;
}
In the index.html file, we used span to apply a bold and italic class to articles 2 and 3. In our CSS file, we selected our span using the article:has(span) syntax. This is the result below:

Here, you can see the changes applied to the bold and italics in the second and third articles. We have not only selected the articles but what the span class was applied to.
Using :has with the :not selection
In this section, we will look at how to use :has pseudo-class with :not.
article:not(:has(span)) {
 background-color: yellowgreen;
}
This is the result below:

It only changes the article that does not have a span class inside.
The :has selector also supports the 0R logical conditions.
article:has(p, .button) {
 background-color: royalblue;
}
This is the result below:

Here, we could select an article with a paragraph OR any article with a button class. The three articles are selected because they all have a p HTML tag. But if we are to remove the p tag, only the last article with the “buy now” button class will remain colored.
CSS :has Use Case and Examples
In this section, we will look at more practical use cases and examples when using the :has selector.
Nav Menu Example
This brings us to the next part of our project, which looks like this:

Here, we moved our mouse over to locations, and you can see the different locations we have when we hover over locations.
When we don’t hover over locations and employees, you will notice that there is no indication that there is any drop-down menu at all. If we use modifier classes for this, we would have to manually go into the HTML file and write the code. However, we can accomplish this with the :has pseudo-class.
.nav__item:has(.nav__submenu)::after {
 font-family: "Font Awesome 5 Free";
 font-weight: 400;
 content: "\f150";
 margin-left: 1rem;
}
In the above code, we are saying, if the .nav__item has a .nav__submenu inside it, apply the design to only the first two navbars. This is the result below:

Modal Example
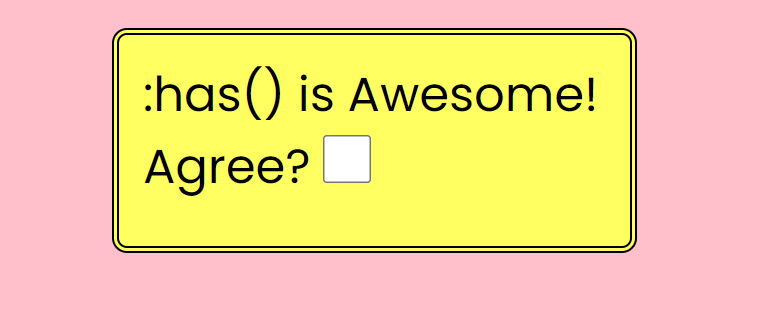
We can do a modal with JavaScript, but now, we can also do it with the :has selector. This next example takes us to the next part of the project, which looks like this:

When the checkbox is ticked, nothing happens. But we can easily make something happen with the :has pseudo-class.
.awesome:has(.awesome__terms:checked) {
 display: none;
}
The .awesome class is our modal. Then we said if we have .awesome__terms: checked let the following page show up when we click the checkbox again:

Perfect!
Light & dark mode example
This is another quick example of how we can apply something if it’s checked.
.three:has(.lightswitch:checked) {
 background-color: var(--COLOR);
 color: var(--BGCOLOR);
}
Once we apply the code above and click on “Toggle Dark Mode”, this is the result below:

Now, you can seamlessly toggle between light and dark modes.
Input Validation Example
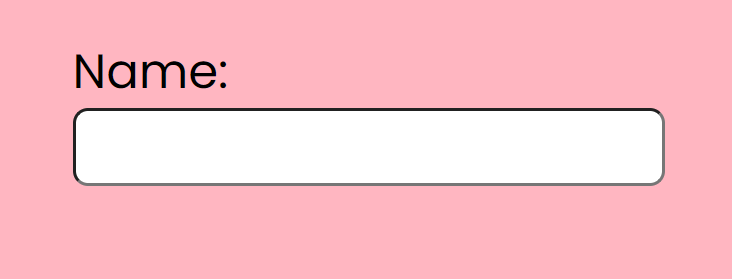
Our final example leads us to the part of our project that looks like this:

The image above shows the label containing the text “Name”, and a text input. Now, we are going to select something in reverse. Before, we could only select forward, so the label would have to come after the text input. We can now change the label based on what’s in the input.
<div>
 <label for="name">Name:</label>
 <br />
 <input
   class="name"
   type="text"
   name="name"
   id="name"
   required
   pattern="^\[A-Z\][A-z]{2,}"
 />
</div>
On our index.html code above, we applied a pattern to the input. Here, we have a required pattern with a Regex that says the text must start with a capital letter and is going to be at least 3 characters. In our style.css, we looked included the following code:
label:has(~ .name:valid)::after {
 content: '✔️';
 color: limegreen;
 margin-left: 1rem;
 font-size: 3rem;
}
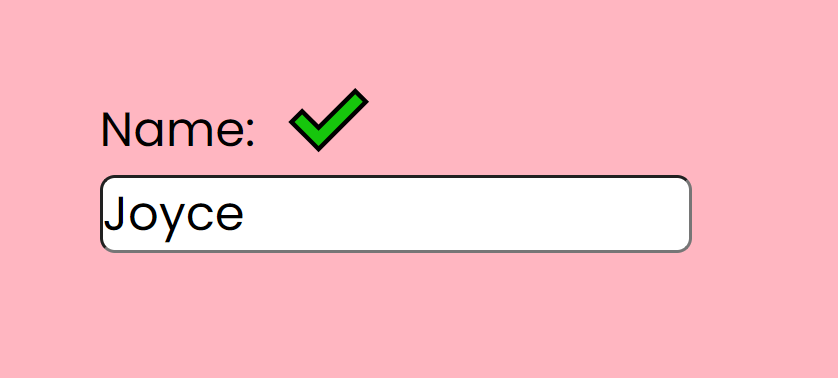
This is the result below:

The name “Joyce” meets the requirement of starting with a capital letter and being up to three words; hence, the green check mark appears.
Now that we have come to the end of this tutorial, I hope you learned a thing or two about the :has CSS selector/pseudo-class.
Conclusion
The CSS :has selector presents an innovative approach to solving complex styling challenges in web development. Throughout this article, we have explored the capabilities and potential use cases of this powerful selector, which allows us to target elements based on their descendants.
By leveraging the :has selector, web developers can enhance the efficiency and flexibility of their CSS code, streamlining the selection process and reducing the need for unnecessary classes and nested structures.
This selector empowers developers to create cleaner, more maintainable code while preserving the HTML structure’s integrity.
Gain control over your UX
See how users are using your site as if you were sitting next to them, learn and iterate faster with OpenReplay. — the open-source session replay tool for developers. Self-host it in minutes, and have complete control over your customer data. Check our GitHub repo and join the thousands of developers in our community.


