
Integrating React with Django


This article will walk through the process of integrating a front-end UI with a backend server, specifically, using Django for the backend and React.js for the front-end.

Discover how at OpenReplay.com.
Our goal is to create a simple project where users can manage food and ingredients. We will leverage Django to handle the backend logic and React.js to interact with the backend server, fetching and displaying data in our front-end application.
Before we begin, ensure you have the following packages installed:
Setting up Backend Project Side
Let’s proceed by setting up the backend project. Follow the steps below to ensure a smooth setup process.
- Create a folder for the project.
- Open the folder in your terminal or Git Bash tool.
- Install necessary packages.
- Create a Django project with any name of your choice. In this tutorial, the project name will be
backend:
django-admin startproject backend- Navigate to the project directory:
cd backend- Create a new app within the project:
python manage.py startapp appSetting up Django REST API
To begin setting up the Django REST API, we first need to define the database schema for our project in the models.py file. Here, we define a Django model named React, which includes two fields: food and ingredient.
from django.db import models

class React(models.Model):
 food = models.CharField(max_length=30)
 ingredient = models.CharField(max_length=200)
Create a file named serializer in the main app, this is to convert complex data to JSON:
from rest_framework import serializers
from .models import React

class ReactSerializer(serializers.ModelSerializer):
    class Meta:
 model = React
 fields = ['food', 'ingredient']
Serializers in Django REST Framework help convert complex data types into native Python data types, which can then be easily rendered into JSON.
Here, we create a serializer for our React model, specifying the fields to include in the serialized representation.
Creating Methods and Defining Endpoints for API Resources
To create methods and define endpoints for API resources, we need to set up views in views.py that will handle GET and POST requests. This setup ensures that our API can efficiently handle requests and provide the necessary data to the client, forming a crucial part of our backend functionality.
from rest_framework.views import APIView
from rest_framework.response import Response
from .models import React
from .serializer import ReactSerializer
class ReactView(APIView):
serializer_class = ReactSerializer
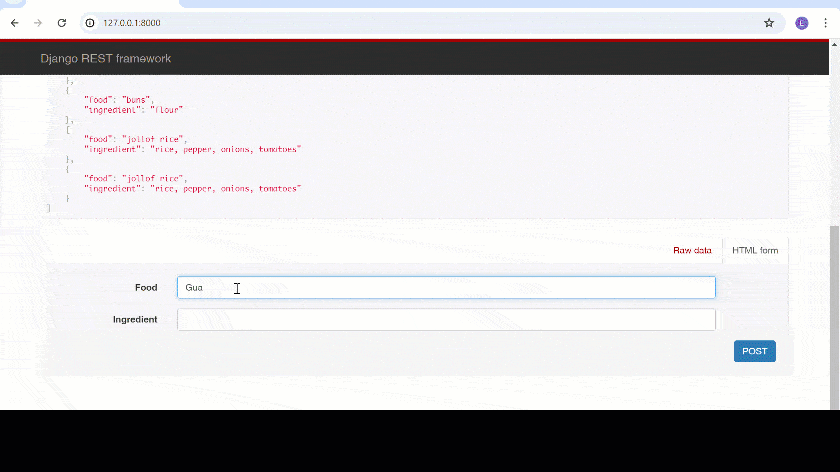
def get(self, request):
output = [{"food": item.food, "ingredient": item.ingredient}
for item in React.objects.all()]
return Response(output)
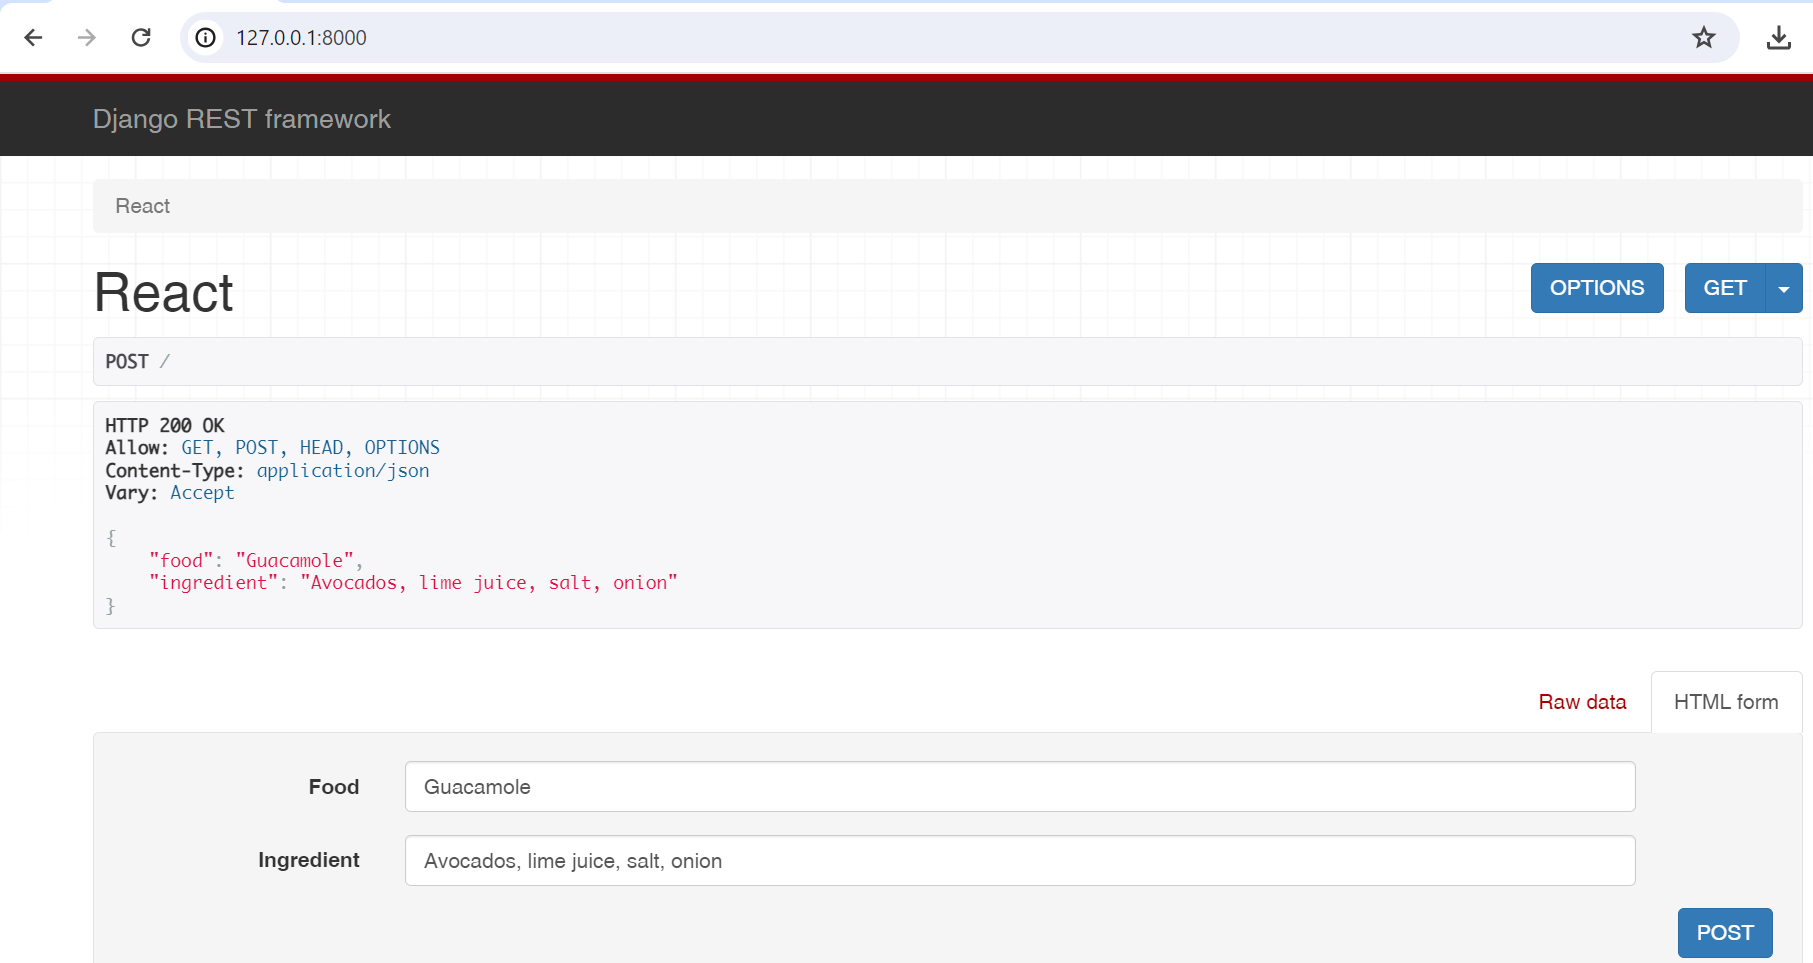
def post(self, request):
serializer = ReactSerializer(data=request.data)
if serializer.is_valid(raise_exception=True):
serializer.save()
return Response(serializer.data)We create a class-based view ReactView that inherits from APIView. The GET method retrieves all instances of the React model and serializes them into JSON format, while the POST method creates a new instance of the React model based on the data received in the request.
Configure URLs in urls.py:
from django.contrib import admin
from django.urls import path
from app.views import ReactView

urlpatterns = [
 path('admin/', admin.site.urls),
 path('', ReactView.as_view(), name="abc"),

]
We define a URL pattern that maps requests to the ReactView class-based view.
Let’s integrate the relevant settings configurations for Django REST Framework (DRF) and Django CORS Headers into the settings.py file.
from pathlib import Path

# Build paths inside the project like this: BASE_DIR / 'subdir'.
BASE_DIR = Path(__file__).resolve().parent.parent


# SECURITY WARNING: keep the secret key used in production secret!
SECRET_KEY = 'q8l6w*1nq6dr49*ac5gevvck@@#bed5y^ll_(-+ms5rfgznwfy'

# SECURITY WARNING: don't run with debug turned on in production!
DEBUG = True

ALLOWED_HOSTS = []


# Application definition

INSTALLED_APPS = [
    'django.contrib.admin',
    'django.contrib.auth',
    'django.contrib.contenttypes',
    'django.contrib.sessions',
    'django.contrib.messages',
    'django.contrib.staticfiles',
    'app',
    'rest_framework',
    'corsheaders',
]

MIDDLEWARE = [
    'django.middleware.security.SecurityMiddleware',
    'django.contrib.sessions.middleware.SessionMiddleware',
    'django.middleware.common.CommonMiddleware',
    'django.middleware.csrf.CsrfViewMiddleware',
    'django.contrib.auth.middleware.AuthenticationMiddleware',
    'django.contrib.messages.middleware.MessageMiddleware',
    'django.middleware.clickjacking.XFrameOptionsMiddleware',
    'corsheaders.middleware.CorsMiddleware',
]


REST_FRAMEWORK = {"DEFAULT_PERMISSION_CLASSES": [
    "rest_framework.permissions.AllowAny"]}

CORS_ORIGIN_ALLOW_ALL = True

ROOT_URLCONF = 'backend.urls'

TEMPLATES = [
 {
        'BACKEND': 'django.template.backends.django.DjangoTemplates',
        'DIRS': [],
        'APP_DIRS': True,
        'OPTIONS': {
            'context_processors': [
                'django.template.context_processors.debug',
                'django.template.context_processors.request',
                'django.contrib.auth.context_processors.auth',
                'django.contrib.messages.context_processors.messages',
 ],
 },
 },
]

WSGI_APPLICATION = 'backend.wsgi.application'

DATABASES = {
    'default': {
        'ENGINE': 'django.db.backends.sqlite3',
        'NAME': BASE_DIR / 'db.sqlite3',
 }
}

AUTH_PASSWORD_VALIDATORS = [
 {
        'NAME': 'django.contrib.auth.password_validation.UserAttributeSimilarityValidator',
 },
 {
        'NAME': 'django.contrib.auth.password_validation.MinimumLengthValidator',
 },
 {
        'NAME': 'django.contrib.auth.password_validation.CommonPasswordValidator',
 },
 {
        'NAME': 'django.contrib.auth.password_validation.NumericPasswordValidator',
 },
]

LANGUAGE_CODE = 'en-us'
TIME_ZONE = 'UTC'
USE_I18N = True
USE_L10N = True
USE_TZ = True
STATIC_URL = '/static/'- We’ve added
'rest_framework'and'corsheaders'to theINSTALLED_APPSlist to includeDjango REST FrameworkandDjango CORS Headersin our project. - The
CORS_ORIGIN_ALLOW_ALLsetting is set toTrue, allowing requests from any origin. This is suitable for development but should be configured more restrictively in production. - We’ve added
'corsheaders.middleware.CorsMiddleware'to theMIDDLEWARElist to enable the CORS middleware for our Django project.
This configuration enables Django REST Framework and CORS Headers in our Django project, allowing us to build a RESTful API and handle CORS requests from our React.js front-end.
Making Migrations
Run migrations to create the necessary database tables for our Django project. To make migrations, run the following command in your terminal:
python manage.py makemigrationsThis command analyzes the changes made to the models and creates migration files that represent those changes.
- Applying Migrations
python manage.py migrateThis command executes the migration files and updates your database schema accordingly.
- Creating a Superuser
python manage.py createsuperuserFollow the prompts to provide a username, email, and password for the superuser.
- Running the Development Server To run the Django project locally for development purposes, we use the runserver command:
python manage.py runserver
This command starts the Django development server, allowing us to access the project through a web browser.
Setting up Front-end Project Side
Now, let’s set up our React.js front-end to work seamlessly with our Django backend. Follow the steps below to ensure a smooth setup process.
- Create a React app:
npx create-react-app frontend- Install Axios, a tool for connecting front-end to backend:
npm install axios- Open the React app in your code editor.
Creating Form
To handle form submission and POST requests, we need to create a new file named Form.js in our React application. This file will contain a React component designed to manage the state and handle user input for food and ingredient entries.
import React, { Component } from "react";
import axios from "axios";

class Form extends Component {
  state = {
    food: "",
    ingredient: "",
  };

  handleChange = (e) => {
    this.setState({
      [e.target.name]: e.target.value,
    });
  };

  handleSubmit = (e) => {
    e.preventDefault();
    const { food, ingredient } = this.state;

    axios
      .post("http://localhost:8000/", { food, ingredient })
      .then((res) => {
        console.log(res.data);
        this.props.addNewItem(res.data);
        this.setState({ food: "", ingredient: "" });
      })
      .catch((err) => {
        console.error("Error posting data:", err);
      });
  };

  render() {
    return (
      <form onSubmit={this.handleSubmit}>
        <div>
          <label>Food:</label>
          <input
            type="text"
            name="food"
            value={this.state.food}
            onChange={this.handleChange}
            required
          />
        </div>
        <div>
          <label>Ingredient:</label>
          <input
            type="text"
            name="ingredient"
            value={this.state.ingredient}
            onChange={this.handleChange}
            required
          />
        </div>
        <button type="submit">Add Item</button>
      </form>
    );
  }
}

export default Form;
The Form component handles the form submission logic and sends the POST request using Axios. Upon receiving a successful response from the backend for the POST request, the addNewItem method is called in the App component. This method updates the component state with the newly added item, ensuring that it appears dynamically in the UI alongside the existing data fetched from the backend.
Implementing Data Fetching and Rendering
To implement data fetching and rendering in our React application, we need to update App.js to fetch data from the Django backend and display it. Follow the code below:
import React, { Component } from "react";
import axios from "axios";
import Form from "./Form";

class App extends Component {
  state = {
    details: [],
  };

  componentDidMount() {
    this.fetchData();
  }

  fetchData = () => {
    axios
      .get("http://localhost:8000/")
      .then((res) => {
        console.log("Response:", res);
        if (res.data && Array.isArray(res.data)) {
          this.setState({
            details: res.data,
          });
        } else {
          console.error("Invalid response data:", res.data);
        }
      })
      .catch((err) => {
        console.error("Error fetching data:", err);
      });
  };

  addNewItem = (item) => {
    this.setState((prevState) => ({
      details: [...prevState.details, item],
    }));
  };

  render() {
    return (
      <div>
        <h1>Data From Django Server</h1>
        <Form addNewItem={this.addNewItem} />
        {this.state.details.map((output, id) => (
          <div key={id}>
            <h2>{output.food}</h2>
            <h3>{output.ingredient}</h3>
          </div>
        ))}
      </div>
    );
  }
}

export default App;
In the componentDidMount lifecycle method of the App component, we utilize Axios to send a GET request to the Django backend API endpoint. This request aims to fetch the server’s existing food and ingredient data.
Upon receiving a successful response from the backend, we handle the data by updating the component state. The fetched data, containing an array of food and ingredient items, is stored in the details state variable.
In addition to fetching existing data, the App component also renders a Form component, which allows us to input new food and ingredient items. When the form is submitted, it triggers a POST request to the backend API endpoint, containing the new item’s data.
Conclusion
In conclusion, integrating React.js with Django presents exciting opportunities for building dynamic web applications. This tutorial has laid out the steps for connecting Django’s powerful backend with React.js’s interactive front-end, making data display seamless in the user interface. Embrace the journey, stay curious, and enjoy the ride as you explore the endless potential of this integration.
Gain Debugging Superpowers
Unleash the power of session replay to reproduce bugs, track slowdowns and uncover frustrations in your app. Get complete visibility into your frontend with OpenReplay — the most advanced open-source session replay tool for developers. Check our GitHub repo and join the thousands of developers in our community.
