Scanning Barcodes from a Web App

Barcodes are standard today as an efficient automation, data capturing, authentication, and identification method. This article looks at the Barcode Detector API, what it is, how it works, and how we can utilize it to build a modern barcode scanning application.

Discover how at OpenReplay.com.
The barcode technology is a system used to represent data in a visual pattern. It works by encoding input data such as text, URLs, numbers, and other types of information, turning them into a series of symbolic machine-readable pictographic formats. This technology can be broadly divided into two categories:
-
Barcode Generators: These are tools and devices such as barcode printers and software applications that encode a given input data and generate a barcode format of a unique black-and-white sequence as a visual representation of the data.
-
Barcode Detectors: These tools include handheld and stationary scanners and mobile computers with an integrated barcode detection software application. They are responsible for reading and decoding the generated barcodes, turning the black-and-white sequence into the original encoded information, which can be further processed or analyzed.
Barcode technology is used today for various purposes, such as content access and authentication on the web. It is also widely used in retail, manufacturing, healthcare, and logistics industries, as it provides a way to streamline processes such as inventory management, retail sales, and asset tracking by enabling rapid and accurate data capture. This efficiency leads to time savings and reduced labor costs.
Understanding the JavaScript Barcode Detection API
The Barcode Detection API is a native browser API that allows developers to integrate barcode reading capabilities into their web applications seamlessly.
The BarcodeDetector interface is used to instantiate the barcode detection in a project. It offers two methods for handling barcode detection:
getSupportedFormats()- This returns an array of all the formats supported by the API.detect()- This method returns an array containing the original encoded data of all the barcodes detected in an image or camera stream.
Supported barcode formats
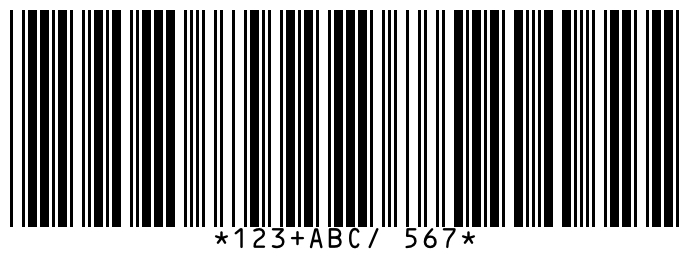
Roughly 30 major barcode formats are used today for different purposes, all represented by either 1D (linear) or 2D (matrix) barcode symbols.
The Barcode Detection API only supports a total of 13 barcode formats. They include the following:
| Barcode | Format | Use |
|---|---|---|
 | qr_code | This is a 2D barcode most commonly used on the web today due to its encoding versatility. It can encode various types of information, including URLs, texts, numbers, payment information, authentications, and more. |
 | ean_13 | This is a 1D barcode most commonly used for product identification in retail inventory. It works by encoding numerical data of 13 digits divided into three sections: country, manufacturer, and product codes. |
 | upc_a | This is a linear barcode very commonly used in retail in the United States. It is a subset of the EAN_13 barcode and only encodes 12 unique digits for each item. |
 | aztec | This is a 2D(matrix) barcode that is capable of encoding various types of data, including alphanumeric characters, numeric digits, and byte data. They have a high data capacity, can encode up to 3750 characters or more, and can be used in various industries. |
 | ean_8 | This 1D barcode is a type of barcode symbology commonly used for retail product labeling. It is a shortened version of the EAN-13 barcode, primarily for smaller products with limited space. EAN-8 barcodes only consist of 8 digits. |
 | upc_e | This is another type of barcode commonly used in retail environments. Like EAN-8, UPC-E is a shortened version of the UPC-A barcode and can only encode up to 6 digits. It is also mostly used for smaller products or where space is limited. |
 | itf | This linear barcode is a numeric-only (0-9) barcode symbology commonly used in industrial and logistics. It is named “Interleaved 2 of 5” because the barcode comprises interleaved pairs of digits, each representing one character. |
 | pdf417 | This is a two-dimensional (2D) stacked barcode symbology capable of encoding large amounts of data. They have a maximum data capacity of up to 1.1 kilobytes (or 1,850 alphanumeric characters) per symbol and are used in various industries. |
 | code_128 | This is a linear barcode capable of encoding large amounts of data in a relatively small space. They are capable of encoding all 128 ASCII characters. It is widely used for product identification, inventory management, and shipping applications. |
 | code_39 | This 1D barcode is commonly used in various industries, as it’s capable of encoding alphanumeric characters, including uppercase letters (A-Z), numbers (0-9), and a few special characters (-, ., $, /, +, %, and space). |
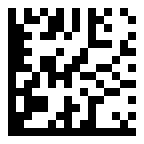
 | data_matrix | This is a two-dimensional (2D) matrix barcode capable of encoding large amounts of data in a compact space. It comprises black and white square modules arranged in a square or rectangular grid. They are used to encode various kinds of data in different industries. |
 | code_93 | This is a linear barcode capable of encoding the full ASCII character set. It extends Code 39 and provides higher data density and security features. It is used in industries where accurate and efficient data capture is required. |
 | codabar | This is a 1D(linear) barcode commonly used in libraries, blood banks, and some transportation and logistics applications. It is a self-checking barcode symbology that encodes numeric digits and a few special characters. It does not support the encoding of alphabetic characters. |
Building a simple barcode-scanning web application
To demonstrate the practical usage of this API, we’ll be building out a simple barcode-scanning application. Below is a preview of what we will be building.
You can also check it out on the live website.
Setting up the HTML structure
Defining the structure of our project. Firstly, we include two elements: an h1 tag to display the application’s title and a container div to hold the rest of the content.
<h1>Scan Barcodes</h1>

<div id="container">
</div>
Next, inside the container div, we include an h2 and p tag to display the supported barcode information.
<h2>Supported Barcode Formats</h2>
<p>Below are the supported barcode formats that can be detected. <span>(scan with mobile phone for better experience)</span></p>
Below this, we create a div to display the supported format list and the button that scans the barcodes when clicked.
<div id="format-list-container">
</div>

<a href="#camera-stream" id="scan-btn">Scan Barcode</a>
Next, we create another div to display the results returned from the barcode scan. Including in it a button to either copy or open the content.
<div id="result-container">
  <div>
    <b>Format:</b>
    <p id="detected-format"></p>
  </div>
  <div>
    <b>Content:</b>
    <p id="result"></p>
  </div>
  <button id="copy-open">Copy</button>
</div>
We create a new p element to display error messages.
<p id="err-msg"></p>Finally, we create the video element to display the camera stream returned from our JavaScript file.
<video id="camera-stream" />That is all for the HTML file.
Moving on, let’s add the barcode scanning functionality to the application.
Display supported formats
Inside the JavaScript file, we need to create a few variables we will work with later.
// GET HTML ELEMENTS
const scanBtn = document.getElementById("scan-btn");
const formatListContainer = document.getElementById("format-list-container");
const camStream = document.querySelector("#camera-stream");
const resultContainer = document.getElementById("result-container");
const detectedFormat = document.getElementById("detected-format");
const result = document.getElementById("result");
const copyOpenBtn = document.getElementById("copy-open");
const errMsg = document.getElementById("err-msg");

let stream;
let formatList = [];
Next, we include the following code to get the supported barcode formats.
// CHECKS AND DISPLAYS THE SUPPORTED BARCODE TYPES
BarcodeDetector.getSupportedFormats().then((supportedFormats) => {
  supportedFormats.forEach((format, i) => {
    formatList.push(format);
    const div = document.createElement("div");
    div.className = "format";
    div.innerHTML = format;
    setTimeout(() => {
      formatListContainer.appendChild(div);
 }, i * 150);
 });
});
The code above calls the getSupportedFormats() method of the BarcodeDetector interface, which returns an array of all the supported formats. It then loops through the array, pushing each format into the formatList array we just created. It then creates a new div element for each entry, displaying it 150 milliseconds after the previous format entry in the formatListContainer, which makes the staggered animation we saw earlier in the preview.
Creating the helper functions
In this section, we will create three helper functions: the first to display error messages to the user, the second to display results read from the scan, and the third to stop the running camera stream. We will be making use of these functions as we move forward.
// DISPLAYS ERROR MESSAGES
const displayErrMsg = (message) => {
  errMsg.innerHTML = `<b>Error</b>: ${message}.<br><br>Try again`;
  errMsg.style.display = "block";
  camStream.style.display = "none";
  scanBtn.textContent = "Scan Barcode";
};

// DISPLAYS THE RESULT READ FROM THE BARCODE
const displayResult = (rslt, frmt) => {
  resultContainer.style.display = "grid";
  result.innerHTML = rslt;
  detectedFormat.innerHTML = frmt;
  // checks if the result is a link or a text
  if (result.innerHTML.includes("://")) {
    copyOpenBtn.innerHTML = "Open";
 } else {
    copyOpenBtn.innerHTML = "Copy";
 }
};

// STOPS THE CURRENT RUNNING CAMERA STREAM
const stopStream = (streamToStop) => {
  streamToStop.getTracks().forEach((track) => track.stop());
  camStream.style.display = "none";
  camStream.srcObject = null;
  scanBtn.textContent = "Scan Barcode";
};
Creating the barcode scanning function
Following the helper functions we created, let’s create a new function to handle the barcode scanning functionality.
async function scanBarcode() {
  try {
    camStream.style.display = "block";
    // barcode scanning logic
 } catch (e) {
    // error handling logic
 }
}
The code above creates a new asynchronous function with a try catch block to handle the scanning logic and potential errors.
Setting up the camera permissions
To scan barcodes, we need to access the device camera. So, moving into the try block of the scanBarcode() function, we include the following code:
// Gets camera stream
stream = await navigator.mediaDevices.getUserMedia({
  video: {
    facingMode: { ideal: "environment" },
 },
  audio: false,
});
camStream.srcObject = stream;
await camStream.play();
scanBtn.textContent = "Scanning...";
The above code requests access to the device camera and stores the result in the stream variable we created earlier. Next, it sets the srcObject of the HTML camStream video element to the contents of the stream variable. Then, it calls the play() method to begin the camera’s live stream in the video element. It also sets the text content of the scanBtn element to scanning... as a visual cue for the user, indicating that the camera stream is running.
Integrating the Barcode Detection API to detect and scan barcodes
Now that we have the camera stream running, we want to be able to detect and scan any barcode in the camera’s view. To achieve this, still inside the try block in the scanBarcode() function, we include the following code:
// Creates new barcode detection instance
const barcodeDetector = new BarcodeDetector({ formats: formatList });
let detected = false;

// Runs detect() every second till a barcode is captured
const intervalID = setInterval(async () => {
  // Detects the contents of the camera stream to capture any visible barcode
  const barcodes = await barcodeDetector.detect(camStream);
  const lastBarcode = barcodes[barcodes.length - 1];
}, 1000);
In the code above, a new BarcodeDetector() instance is created with the array of supported formats as its argument. Next, a detected variable is initialized and set to false, indicating no barcode has been detected yet. Following that, a setInterval() function is created, which ensures the barcode detection runs every second until stated otherwise. Inside this function, the detect() method is called, passing the camera stream camStream as an argument to detect any visible barcodes. It then retrieves the last detected barcode from the array of detected barcodes, assigning it to the lastBarcode variable.
Displaying the results
After we have gotten the last detected barcode, we want to be able to present the data to the user. To do this, we include the following code inside the setInterval() block below the lastBarcode variable.
// If barcode detected, stop the stream and display result
if (barcodes.length > 0) {
  stopStream(stream);
  displayResult(lastBarcode.rawValue, lastBarcode.format);
  detected = true;
  clearInterval(intervalID);
}
The above code stops the camera stream and the running scan when a barcode has successfully been detected, and the data read from the barcode is displayed to the user.
Error handling
The setInterval() function runs every second to detect barcodes in the camera stream. Now, we want to be able to stop the scan when a barcode has been detected or an error has been encountered. To handle this, just before the closing brace of the try block, we create a setTimeout() function to stop the camera stream and the scan if no barcode has been detected in the stream after 15 seconds.
// Stop stream if nothing has been detected after 15 seconds
setTimeout(() => {
  if (!detected) {
    stopStream(stream);
    displayErrMsg("Barcode Not Detected or Format Not Supported");
    clearInterval(intervalID);
 }
}, 15000);
A couple of other errors can be encountered in the application, such as the user denying permission to access their device camera or a network error. To handle these errors, place the following code in the catch block of the scanBarcode() function.
displayErrMsg(e.message);The above code displays the message of the error encountered by the application, giving the user an idea of the issue.
Scan barcodes
After creating the barcode scanning function and handling potential errors, we must apply it to a user-triggered event to start the scanning process. We include the following code below the scanBarcode() function to do that.
// STARTS THE CAMERA STREAM AND SCANS ANY VISIBLE BARCODE IN SIGHT
scanBtn.onclick = () => {
  resultContainer.style.display = "none";
  errMsg.style.display = "none";
  scanBarcode();
};
The above code calls the scanBarcodes() async function on click of the scanBtn element, which then scans the given barcode and displays the encoded data to the user.
Next, we want to provide a way for the user to copy the data if it’s a text or open it in a new tab if it’s a URL. To achieve this, we include the following code in our script.
// COPIES OR OPENS THE RESULT CONTENTS READ FROM THE BARCODE.
copyOpenBtn.onclick = (e) => {
  if (e.target.innerHTML == "Copy") {
    navigator.clipboard.writeText(result.innerHTML).then(() => {
      copyOpenBtn.innerHTML = "Copied!";
 });
 } else if (e.target.innerHTML == "Open") {
    window.open(result.innerHTML, "_blank");
 }
};
The code above copies or opens the data read from the barcode by checking the current text content of the copyOpenBtn element to determine if the contents should be copied or opened in a new tab.
With that, we have successfully created our barcode scanning application, allowing us to scan various barcode formats.
Potential considerations and workarounds
A few issues can arise when using the Barcode Detector API, but there are also workarounds we can implement to mitigate those issues. Let’s take a look at them.
No Browser support
The Barcode Detector API is still in development, and as a result, the API isn’t fully supported by a good number of modern browsers, most of which are desktop browsers. Visit the can I use website to check the API’s browser support table.
This issue can make our application unfunctional when viewed in a browser that doesn’t support the API. To fix this issue, we can provide our application with a Barcode Detector polyfill. To do that, we include the following code at the top of our JavaScript file.
// IMPORT BARCODE DETECTOR POLYFILL
import { BarcodeDetector as BarcodeDetectorPolyfill } from "https://fastly.jsdelivr.net/npm/barcode-detector@2/dist/es/pure.min.js";

// CHECK IF THE BARCODE DETECTION FEATURE IS SUPPORTED IN THE BROWSER
if (!("BarcodeDetector" in window)) {
  // Use polyfill when the browser doesn't natively support the BarcodeDetector API
  window.BarcodeDetector = BarcodeDetectorPolyfill;
}
The code above imports a polyfill for the Barcode Detector API, setting it as the default BarcodeDetector interface in the browser window object if it is not already present. This will enable browsers without native support for the API to make use of the polyfill instead.
JavaScript not enabled
Our application’s functionality solely relies on JavaScript and would not run if scripting is disabled in the user’s browser. To handle this issue, we include the following code before closing the body tag in our HTML file.
<noscript>
  <div style="width: 100vw; height:100vh; z-index:100; position:absolute; top:0; left:0; background-color:#f5f5ff; text-align:center; padding:20px;">
    <h2>Scripting Not Supported</h2> <br>
    <p>This application requires JavaScript to run. <a href="https://support.google.com/adsense/answer/12654?hl=en" target="_blank">Enable scripting</a> in your browser or switch to a browser that supports scripting.</p>
  </div>
</noscript>
The code above displays a message to inform the user to enable scripting in their browser.
Conclusion
That’s all for this article. We have explored the purpose of barcode technologies, the Barcode Detection API, and the different barcode formats. We have also created a simple barcode scanning application that demonstrates the functionality of the Barcode Detection API.
The complete source code for this project can be found on GitHub.
Happy coding!
References
- Barcode Detection API - MDN web docs.
- Barcode - Wikipedia.
- barcode-detector - npm.
- Detecting barcode from the browser!!! - YCM Jason.
Gain control over your UX
See how users are using your site as if you were sitting next to them, learn and iterate faster with OpenReplay. — the open-source session replay tool for developers. Self-host it in minutes, and have complete control over your customer data. Check our GitHub repo and join the thousands of developers in our community.


